> ## Documentation Index
> Fetch the complete documentation index at: https://www.meilisearch.com/docs/llms.txt
> Use this file to discover all available pages before exploring further.
# Strapi v4 guide
> Learn how to use Meilisearch with Strapi v4.
This tutorial will show you how to integrate Meilisearch with [Strapi](https://strapi.io/) to create a search-based web app. First, you will use Strapi’s quick start guide to create a restaurant collection, and then search this collection with Meilisearch.
## Prerequisites
* [Node.js](https://nodejs.org/): active LTS or maintenance LTS versions, currently Node.js >=18.0.0 \<=20.x.x
* npm >=6.0.0 (installed with Node.js)
* A running instance of Meilisearch (v >= 1.x). If you need help with this part, you can consult the [Installation section](/resources/self_hosting/getting_started/install_locally).
## Create a back end using Strapi
### Set up the project
Create a directory called `my-app` where you will add the back and front-end parts of the application. Generate a back-end API using Strapi inside `my-app`:
```bash theme={null}
npx create-strapi-app@latest back --quickstart
```
This command creates a Strapi app in a new directory called `back` and opens the admin dashboard. Create an account to access it.
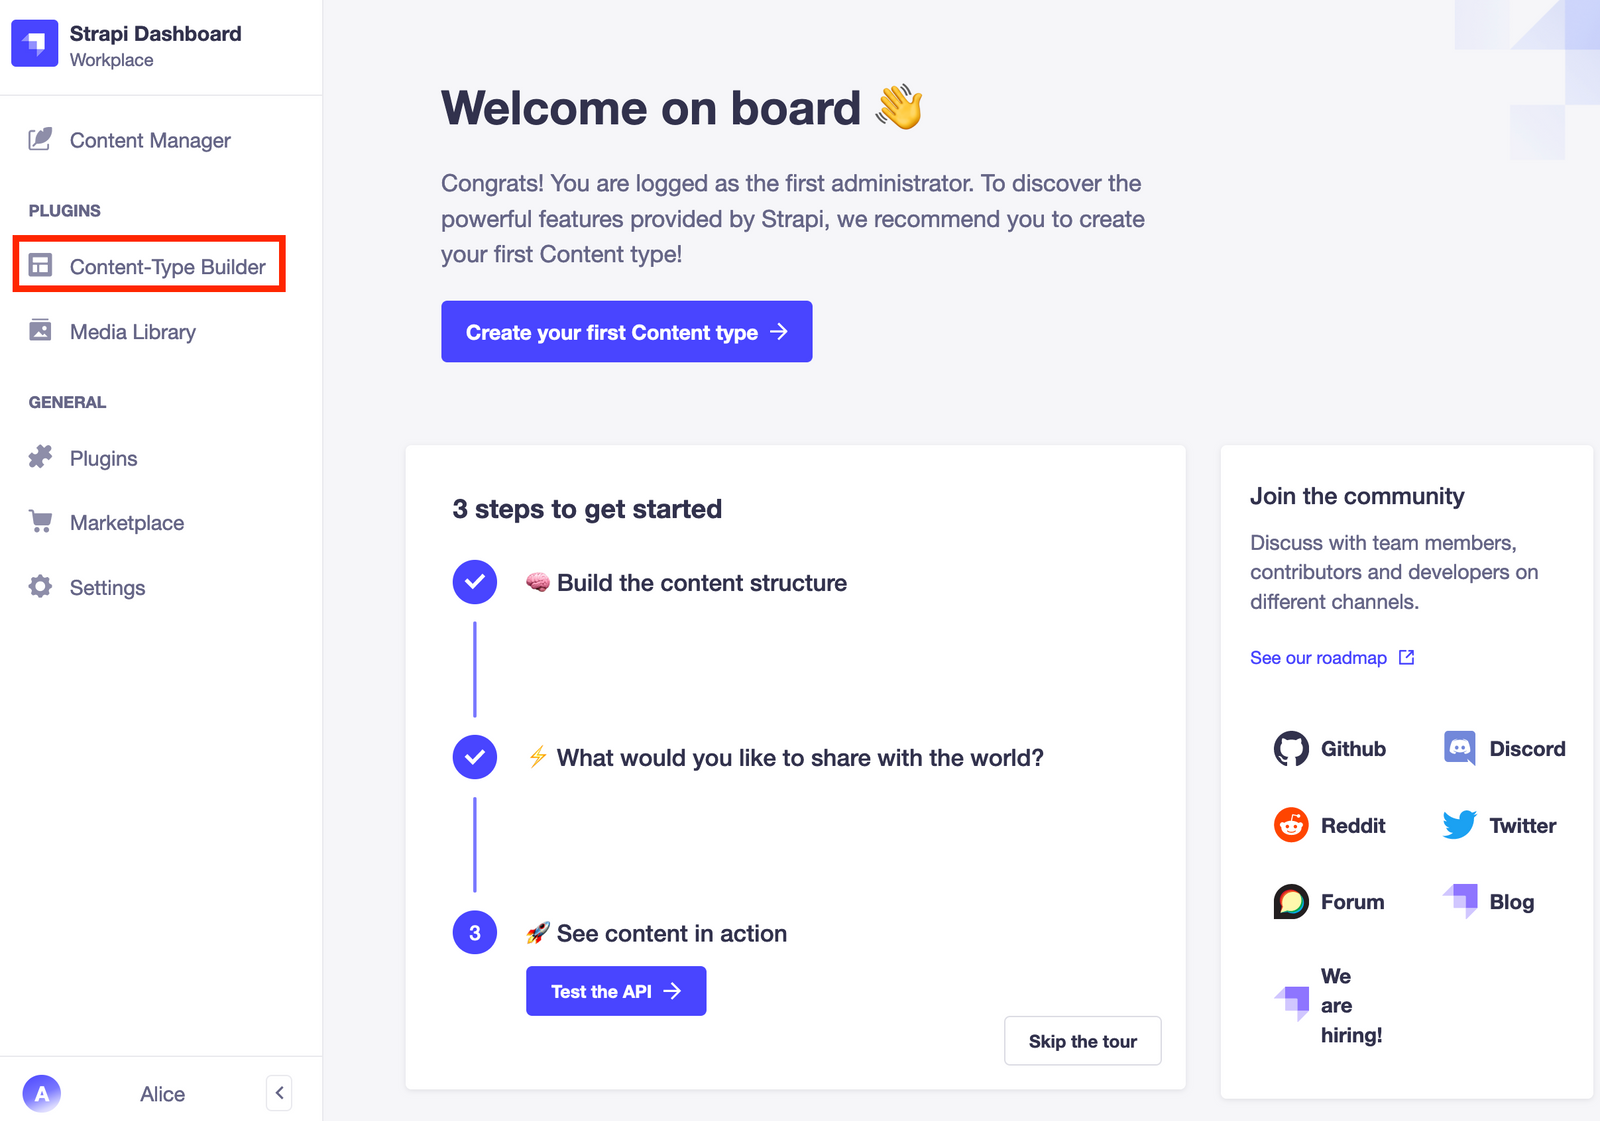
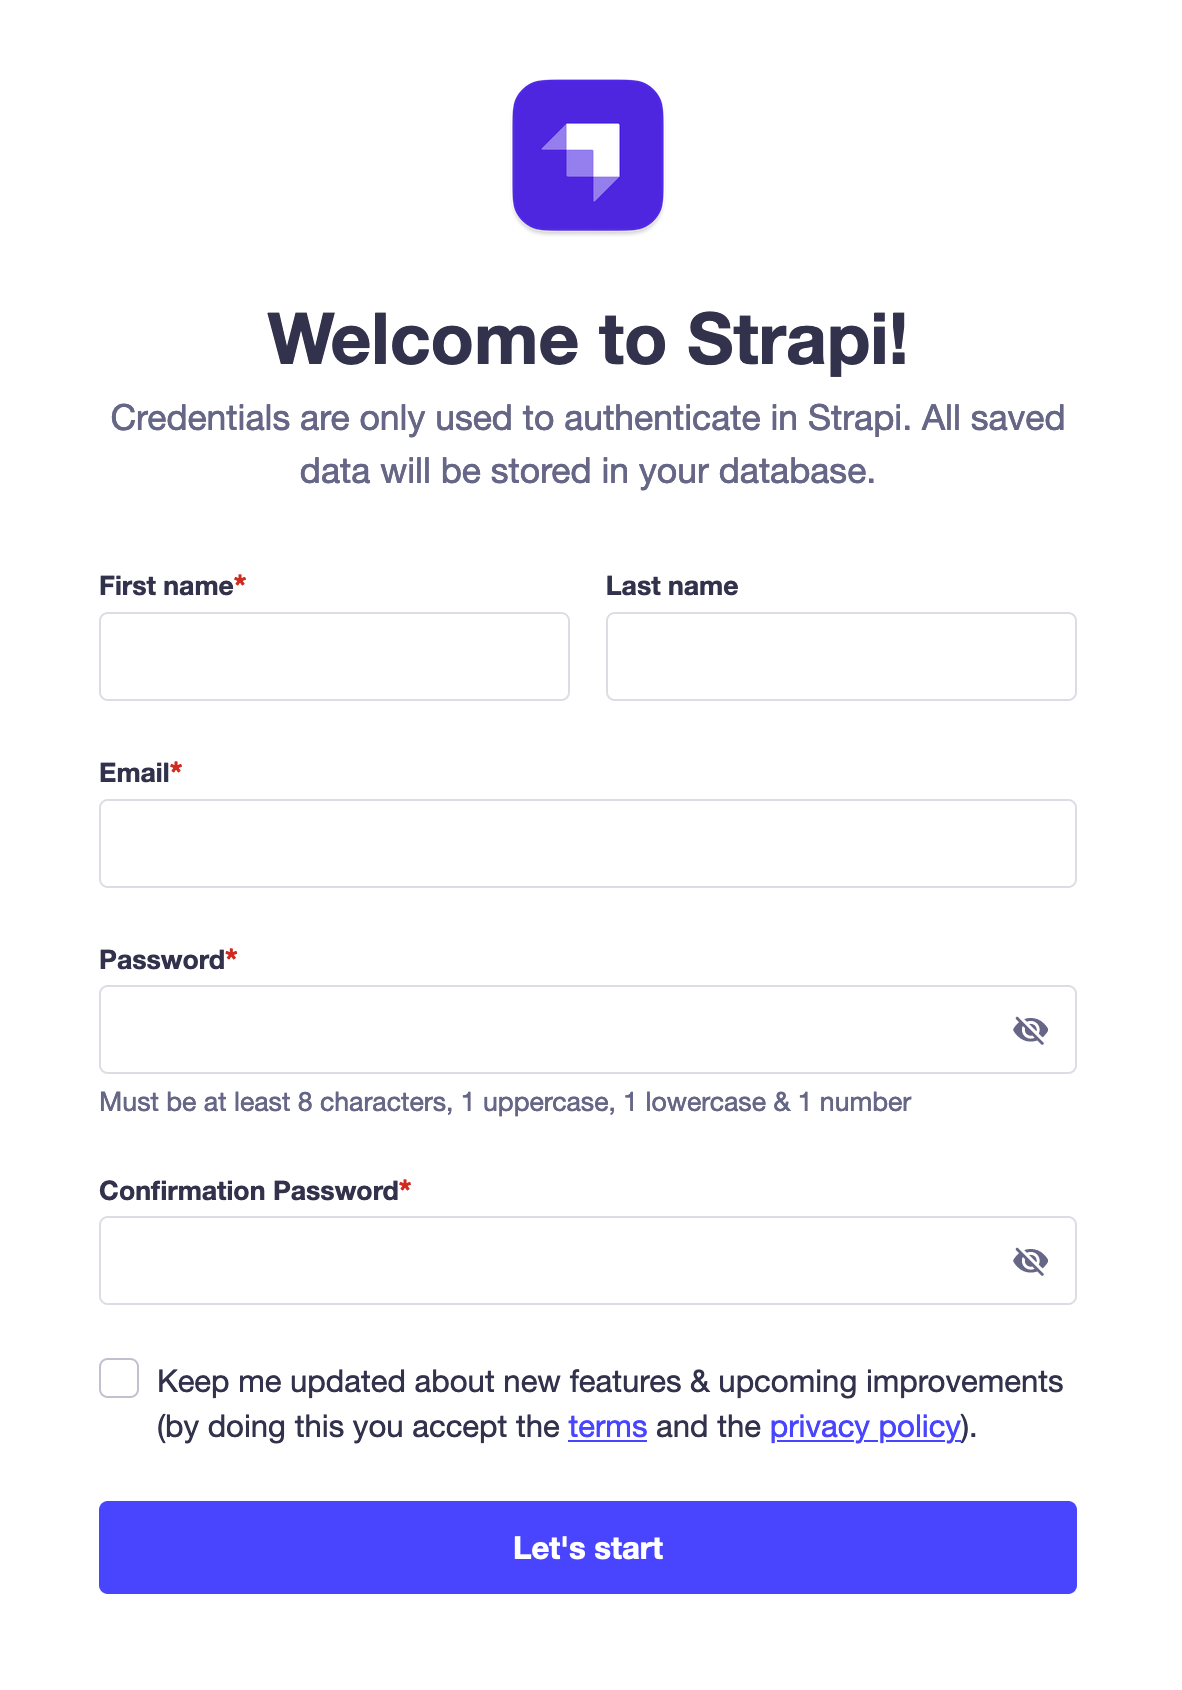 Once you have created your account, you should be redirected to Strapi's admin dashboard. This is where you will configure your back-end API.
### Build and manage your content
The next step is to create a new collection type. A collection is like a blueprint of your content. In this case, it will be a collection of restaurants. You will create another collection called "Category" to organize your restaurants later.
Once you have created your account, you should be redirected to Strapi's admin dashboard. This is where you will configure your back-end API.
### Build and manage your content
The next step is to create a new collection type. A collection is like a blueprint of your content. In this case, it will be a collection of restaurants. You will create another collection called "Category" to organize your restaurants later.
 To follow along, complete "Part B: Build your data structure with the Content-type Builder" and steps 2 to 5 in "Part D: Add content to your Strapi Cloud project with the Content Manager" from Strapi's quick start guide. These will include:
* creating collection types
* creating new entries
* setting roles & permissions
* publishing the content
### Expand your database
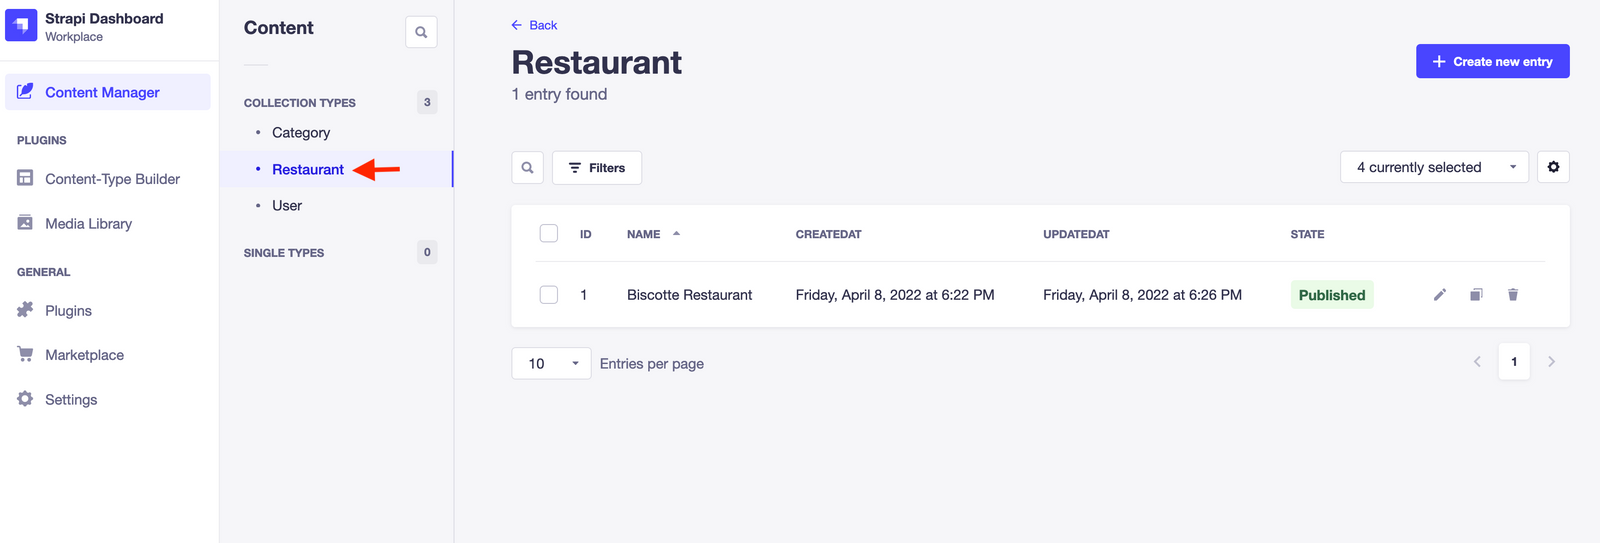
After finishing those steps of Strapi's quick start guide, two new collections named Restaurant and Category should have appeared under `Content Manager > Collection Types`. If you click on `Restaurant`, you can see that there is only one. Add more by clicking the `+ Create new entry` button in the upper-right corner of the dashboard.
To follow along, complete "Part B: Build your data structure with the Content-type Builder" and steps 2 to 5 in "Part D: Add content to your Strapi Cloud project with the Content Manager" from Strapi's quick start guide. These will include:
* creating collection types
* creating new entries
* setting roles & permissions
* publishing the content
### Expand your database
After finishing those steps of Strapi's quick start guide, two new collections named Restaurant and Category should have appeared under `Content Manager > Collection Types`. If you click on `Restaurant`, you can see that there is only one. Add more by clicking the `+ Create new entry` button in the upper-right corner of the dashboard.
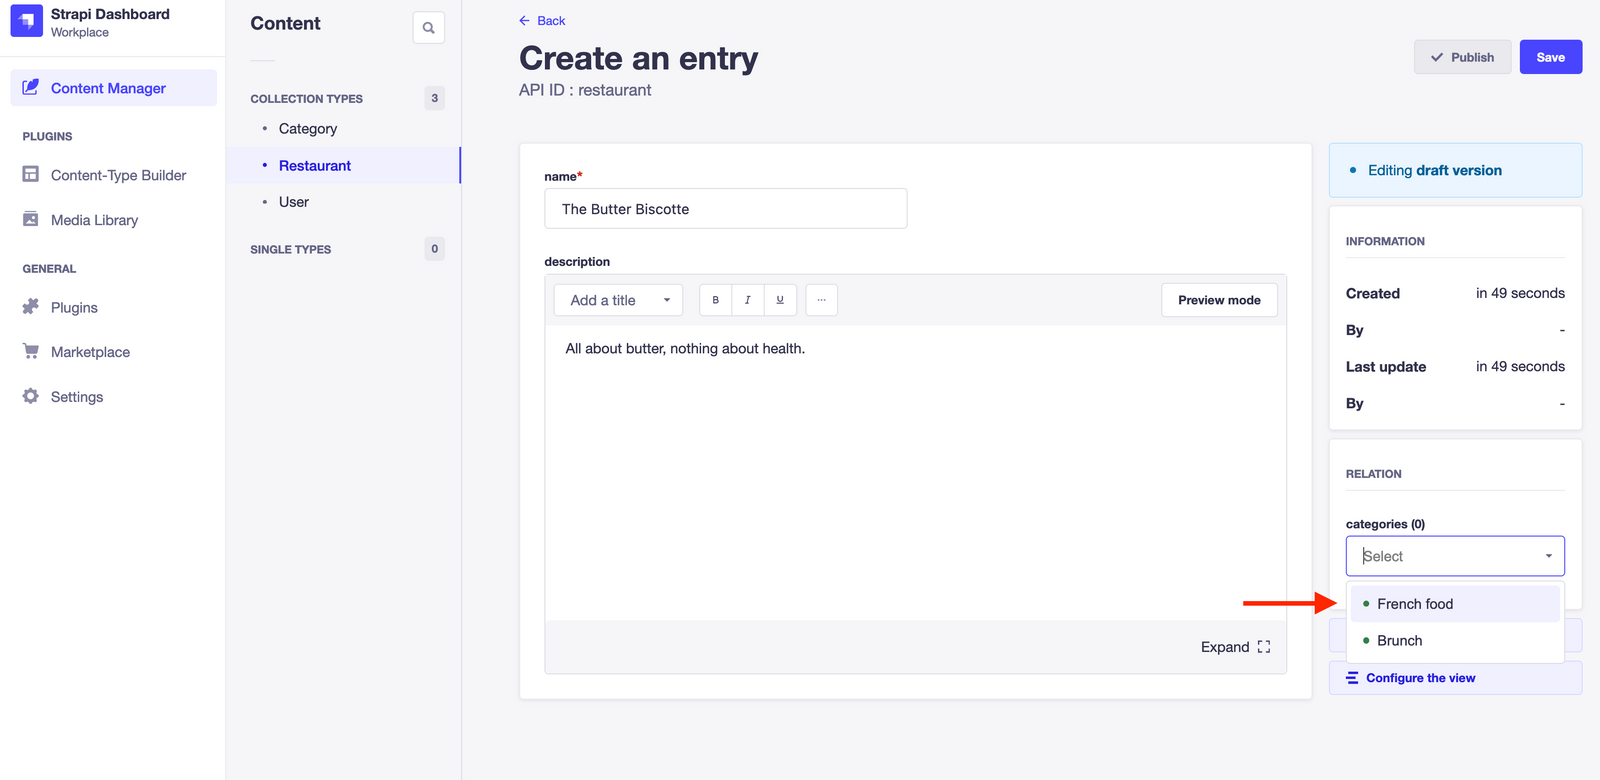
 Add the following three restaurants, one by one. For each restaurant, you need to press `Save` and then `Publish`.
* Name: `The Butter Biscotte`
* Description: `All about butter, nothing about health.`
Next, add the `French food` category on the bottom right corner of the page.
Add the following three restaurants, one by one. For each restaurant, you need to press `Save` and then `Publish`.
* Name: `The Butter Biscotte`
* Description: `All about butter, nothing about health.`
Next, add the `French food` category on the bottom right corner of the page.
 * Name: `The Slimy Snail`
* Description: `Gastronomy is made of garlic and butter.`
* Category: `French food`
* Name: `The Smell of Blue`
* Description: `Blue Cheese is not expired, it is how you eat it. With a bit of butter and a lot of happiness.`
* Category: `French food`
Your Strapi back-end is now up and running. Strapi automatically creates a REST API for your Restaurants collection. Check Strapi's documentation for all available [API endpoints](https://strapi.io/documentation/developer-docs/latest/developer-resources/content-api/content-api.html#api-endpoints).
Now, it’s time to connect Strapi and Meilisearch and start searching.
## Connect Strapi and Meilisearch
To add the Meilisearch plugin to Strapi, you need to first quit the Strapi app. Go to the terminal window running Strapi and push `Ctrl+C` to kill the process.
Next, install the plugin in the `back` directory.
```bash theme={null}
npm install strapi-plugin-meilisearch
```
After the installation, you have to rebuild the Strapi app before starting it again in development mode, since it makes configuration easier.
```bash theme={null}
npm run build
npm run develop
```
At this point, your Strapi app should be running once again on the default address: [http://localhost:1337/admin](http://localhost:1337/admin). Open it in your browser. You should see an admin log-in page. Enter the credentials you used to create your account.
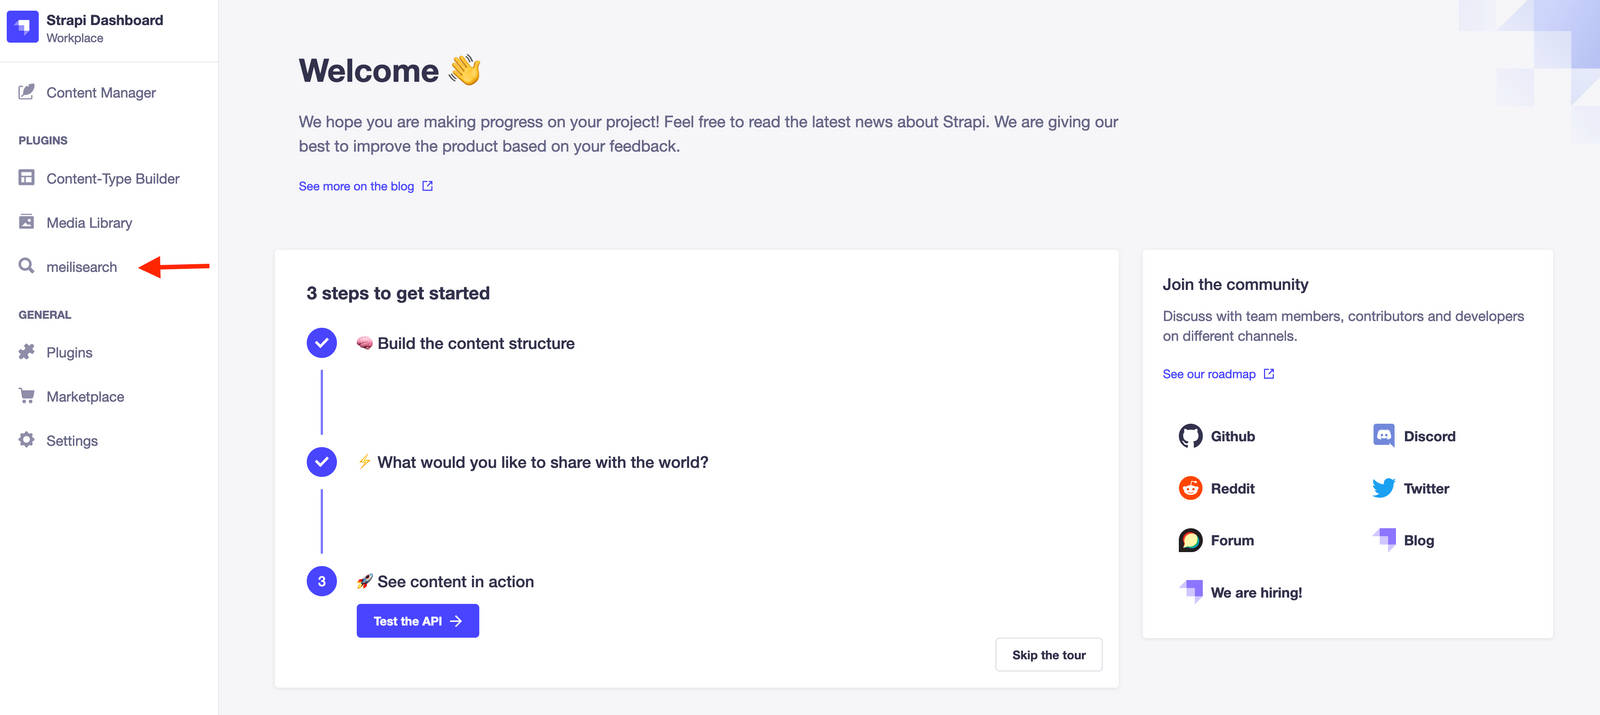
Once connected, you should see the new `meilisearch` plugin on the left side of the screen.
* Name: `The Slimy Snail`
* Description: `Gastronomy is made of garlic and butter.`
* Category: `French food`
* Name: `The Smell of Blue`
* Description: `Blue Cheese is not expired, it is how you eat it. With a bit of butter and a lot of happiness.`
* Category: `French food`
Your Strapi back-end is now up and running. Strapi automatically creates a REST API for your Restaurants collection. Check Strapi's documentation for all available [API endpoints](https://strapi.io/documentation/developer-docs/latest/developer-resources/content-api/content-api.html#api-endpoints).
Now, it’s time to connect Strapi and Meilisearch and start searching.
## Connect Strapi and Meilisearch
To add the Meilisearch plugin to Strapi, you need to first quit the Strapi app. Go to the terminal window running Strapi and push `Ctrl+C` to kill the process.
Next, install the plugin in the `back` directory.
```bash theme={null}
npm install strapi-plugin-meilisearch
```
After the installation, you have to rebuild the Strapi app before starting it again in development mode, since it makes configuration easier.
```bash theme={null}
npm run build
npm run develop
```
At this point, your Strapi app should be running once again on the default address: [http://localhost:1337/admin](http://localhost:1337/admin). Open it in your browser. You should see an admin log-in page. Enter the credentials you used to create your account.
Once connected, you should see the new `meilisearch` plugin on the left side of the screen.
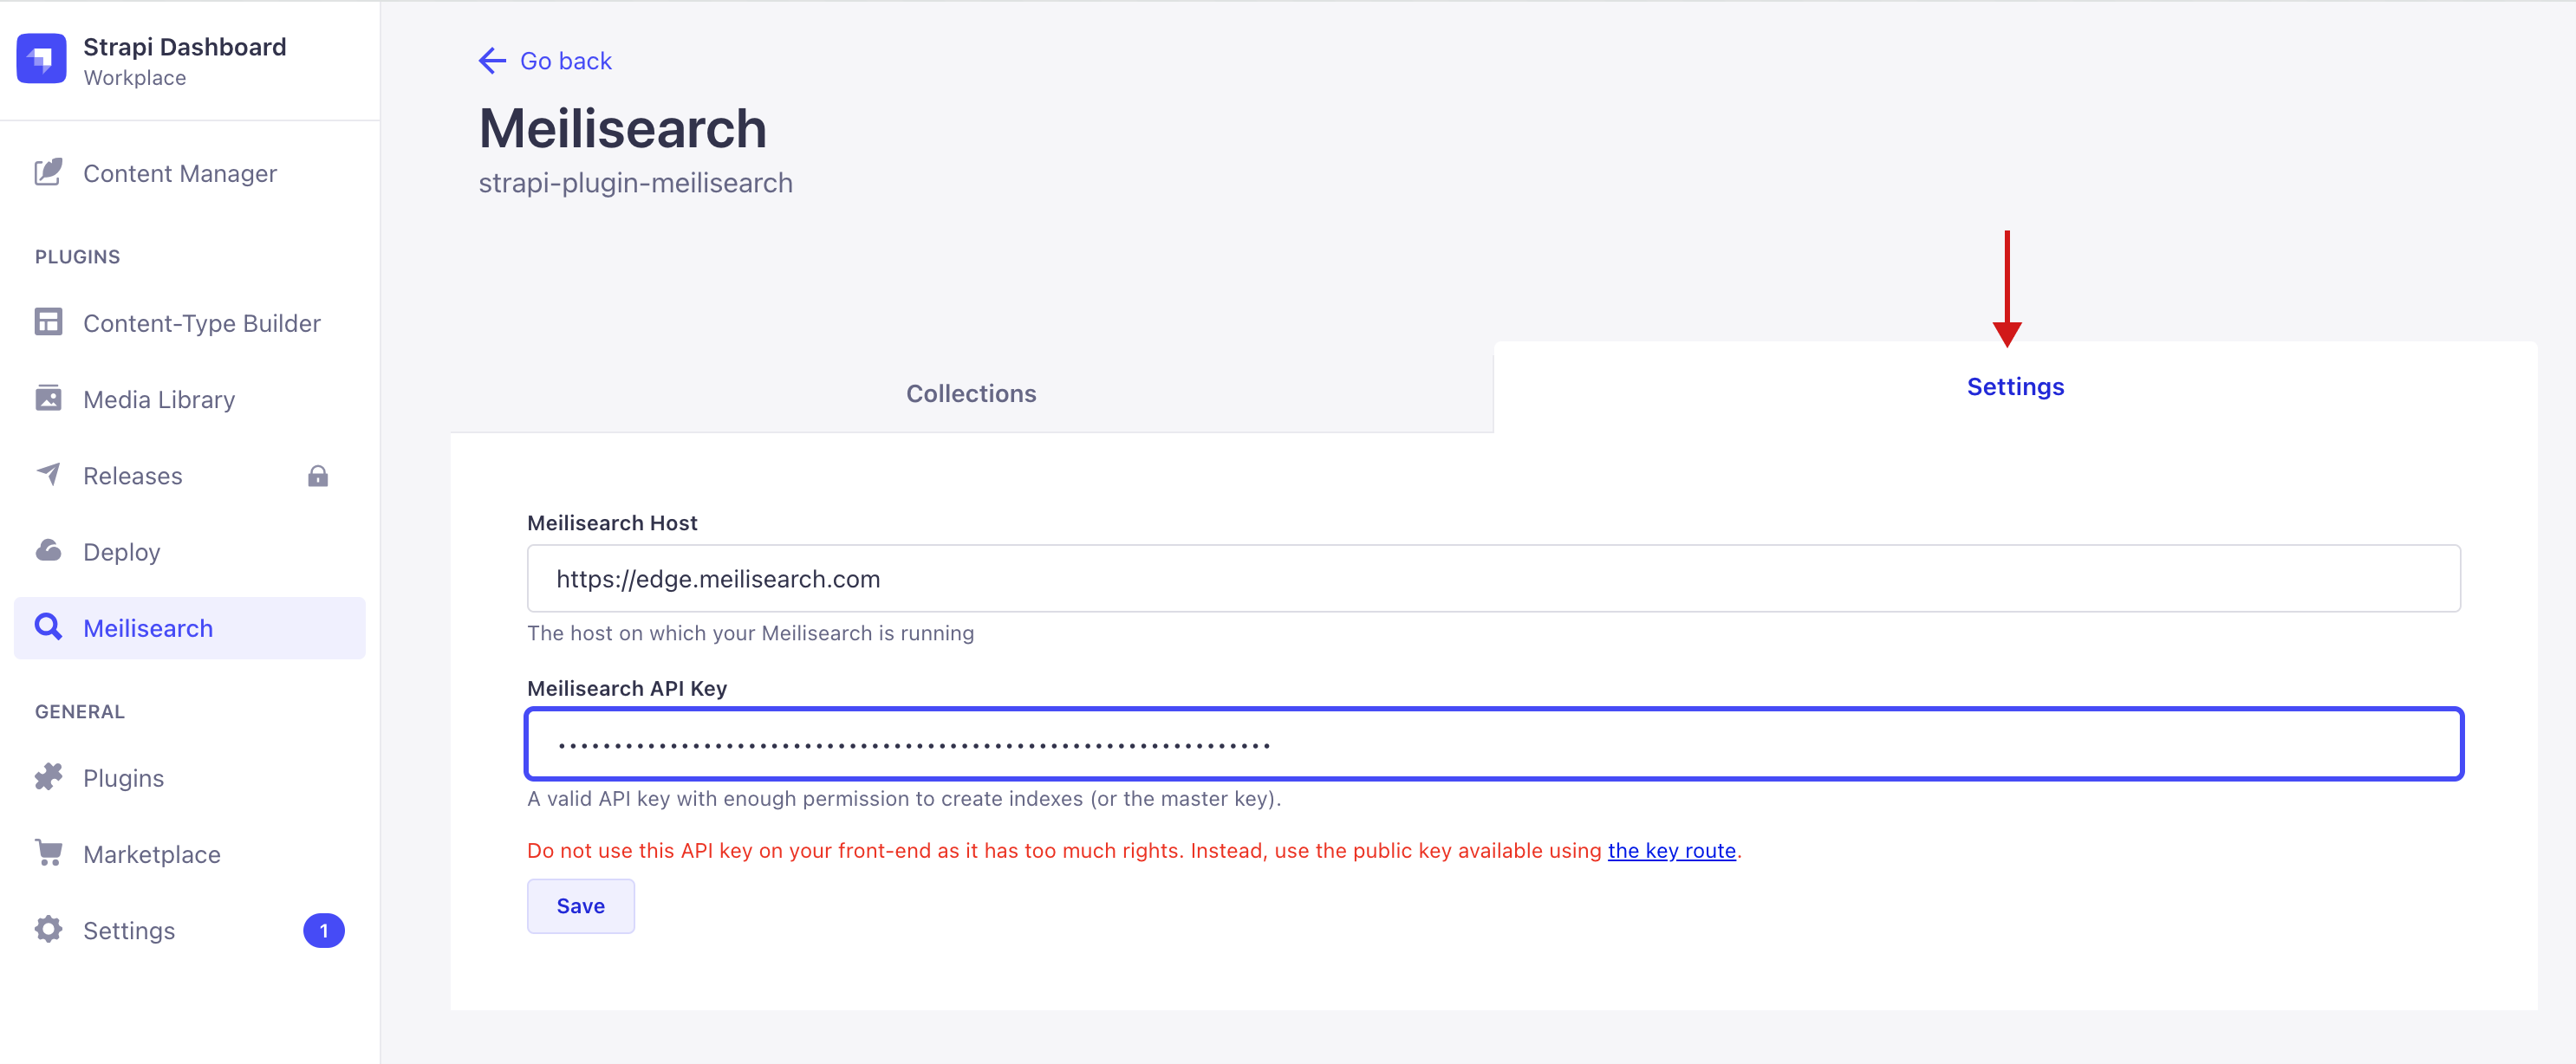
 Add your Meilisearch credentials on the Settings tab of the `meilisearch` plugin page.
 Now it's time to add your Strapi collection to Meilisearch. In the `Collections` tab on the `meilisearch` plugin page, you should see the `restaurant` and `category` content-types.
By clicking on the checkbox next to `restaurant`, the content-type is automatically indexed in Meilisearch.
Now it's time to add your Strapi collection to Meilisearch. In the `Collections` tab on the `meilisearch` plugin page, you should see the `restaurant` and `category` content-types.
By clicking on the checkbox next to `restaurant`, the content-type is automatically indexed in Meilisearch.
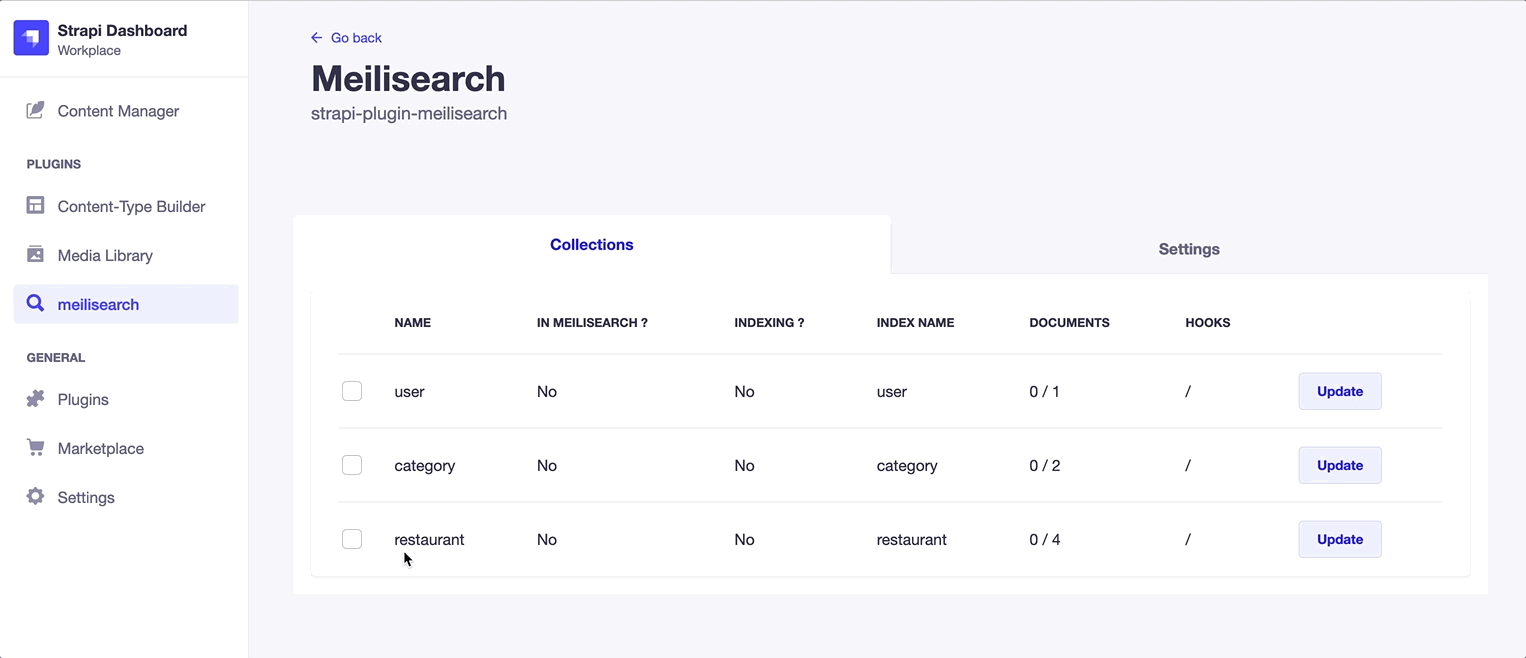 The word “Hooked” appears when you click on the `restaurant`'s checkbox in the `Collections` tab. This means that each time you add, update or delete an entry in your restaurant content-types, Meilisearch is automatically updated.
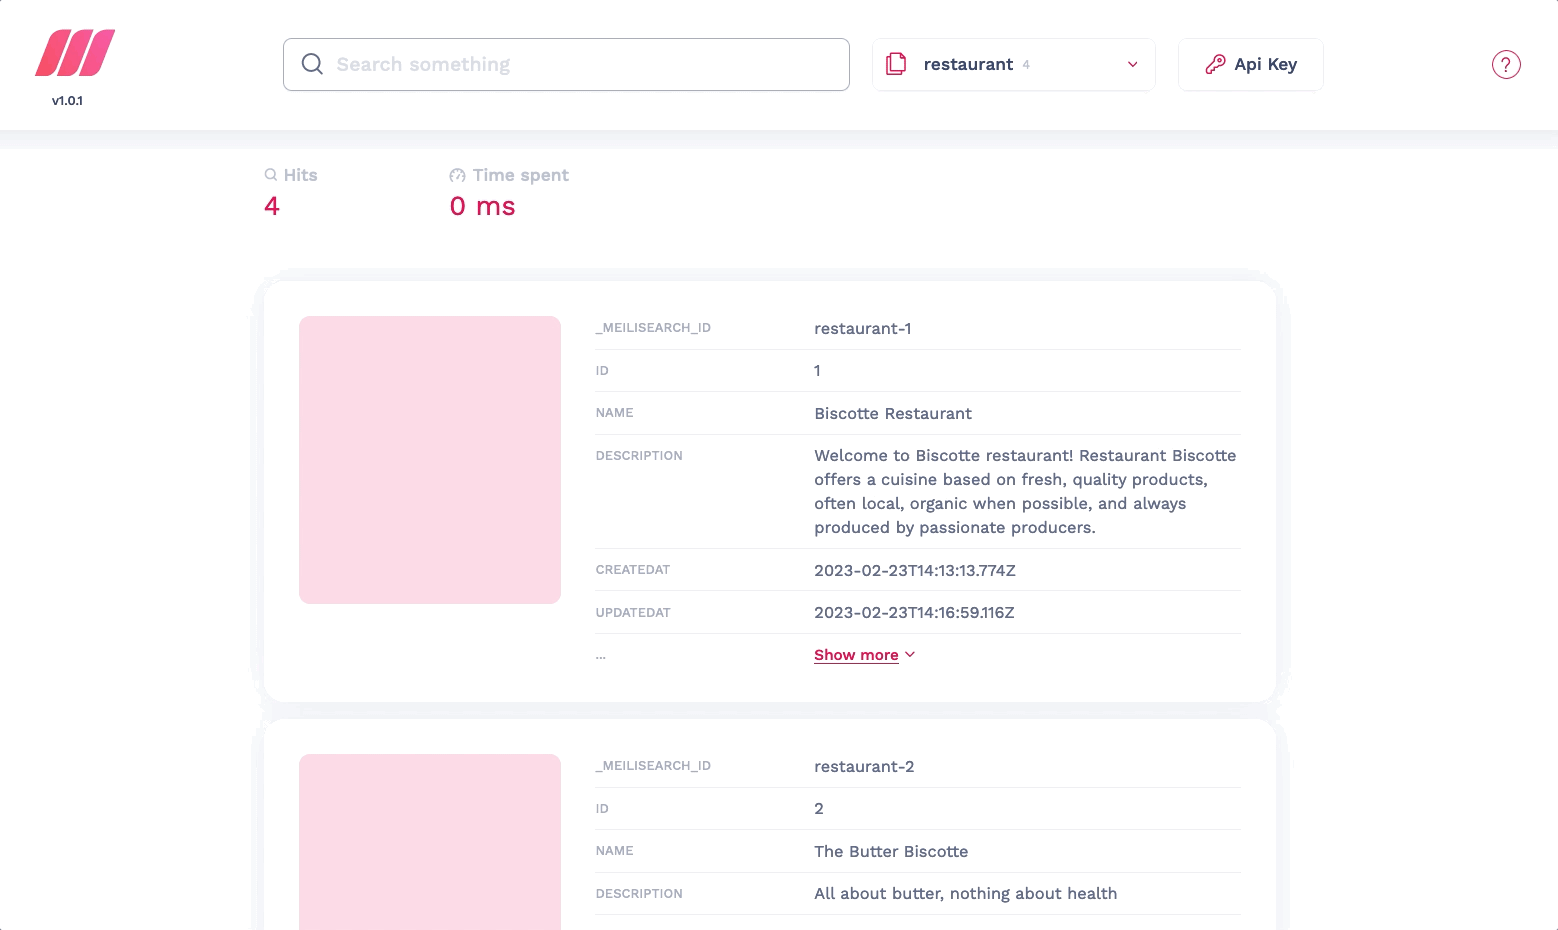
Once the indexing finishes, your restaurants are in Meilisearch. Access the [search preview](/resources/self_hosting/getting_started/search_preview) to confirm everything is working correctly by searching for “butter”.
The word “Hooked” appears when you click on the `restaurant`'s checkbox in the `Collections` tab. This means that each time you add, update or delete an entry in your restaurant content-types, Meilisearch is automatically updated.
Once the indexing finishes, your restaurants are in Meilisearch. Access the [search preview](/resources/self_hosting/getting_started/search_preview) to confirm everything is working correctly by searching for “butter”.
 Your Strapi entries are sent to Meilisearch as is. You can modify the data before sending it to Meilisearch, for instance by removing a field. Check out all the customization options on the [strapi-plugin-meilisearch page](https://github.com/meilisearch/strapi-plugin-meilisearch/#-customization).
## Next steps
This tutorial showed you how to add your Strapi collections to Meilisearch.
In most real-life scenarios, you'll typically build a custom search interface and fetch results using Meilisearch's API. To learn how to quickly build a front-end interface of your own, check out the [Front-end integration page](/getting_started/instant_meilisearch/javascript) guide.
Your Strapi entries are sent to Meilisearch as is. You can modify the data before sending it to Meilisearch, for instance by removing a field. Check out all the customization options on the [strapi-plugin-meilisearch page](https://github.com/meilisearch/strapi-plugin-meilisearch/#-customization).
## Next steps
This tutorial showed you how to add your Strapi collections to Meilisearch.
In most real-life scenarios, you'll typically build a custom search interface and fetch results using Meilisearch's API. To learn how to quickly build a front-end interface of your own, check out the [Front-end integration page](/getting_started/instant_meilisearch/javascript) guide.